Hakuen Studio Picture Manager for RPG Maker MZ
A downloadable RPG Maker Plugin
Introduction
This plugin implements a new way to show images(pictures) on the screen. Meaning it will not interfere with the default Picture commands.
You will be able to do several things to show pictures on the screen, all of them by using plugin commands.
Features
- Show and Move pictures at the same time!
- Show pictures on different layers:
- Default
- Tilemap (between tiles and characters)
- Below Weather
- Below Windows
- Above Windows
- Above Everything
- You can Bind pictures to the map or to the screen!
- Apply Mask images or shapes to the pictures!
- Show picture positions relative to another game object!
- Plays a common event when clicking/touching a picture, enters the mouse above a picture, and leaves the mouse out of a picture!
- Change all these picture settings, using easing animations:
- Anchor, Blend mode, X, Y, Opacity, Scale, Skew, Angle and Rotation, Tone Color, Blend Color, and Hue.
- You can make picture animations loop from initial to target values!
- Set Breath, Float, Shake, and Card effects to the pictures!
- Move and change settings for multiple pictures at the same time!
- Erase one or more pictures at the same time!
- Apply PIXI filters to pictures!
- You can use variables to set values on the arguments of almost all plugin commands!
Plugin Parameters
- Clicked Picture Id → When you click/touch a picture, the plugin will store the picture id inside this variable.
- Mouse Enter Picture Id → When the mouse hovers over a picture, it will store the picture id inside this variable.
- Mouse Exit Picture Id → When the mouse stops hovering/ leaves a picture, it will store the picture id inside this variable. This can also be understood by the “last picture id” you had with your mouse above it.
Touch opacity
This will make the picture only recognize the mouse/touch interaction if the pixel interacted has the opacity higher than specified.
The value can be from 0 to 255. If you put 0, this feature is disabled. Meaning the picture will receive the click/mouse/touch anywhere on its image. This is the default behavior.
Plugin Commands
Full Show Picture
With this command, you will be able to show a picture on the screen with several options. You can show in a fixed position or you can show and move at the same time.
Filename
The filename of the picture under img/picture folder. You can use the text field to write \v[id].
ID
The picture id. You can use numbers like the default pictures, but you can also use text. If you use text, it is case-sensitive.
On this command specifically, you can only insert one ID, and show one picture at a time.
But on other plugin commands, you can set several picture ids, to apply the commands to several pictures at the same time by using the Multiple operators.
Group Name
You can optionally set a Group Name when creating a picture. This will make that picture ID be attached to that group name. Now, on other commands, you can specify this group name on the Picture ID field. This will make that command be applied to all picture IDs that belong to that group. Just write the following:
- Group:Your Group Name
Just remember: Group names cannot have spaces, cannot be numbers, and they are not case sensitive.
Main Settings
These settings are similar to the ones on the show picture command. But, with more options to choose. You will decide here where and how the picture will be shown on screen, and also, it’s movement animation.
Origin(Anchor)
Works the same as the default picture commands. But you can choose more than just Upper Left and Center.
Blend Mode
Works the same as the default picture command.
Default Anime Settings
- Duration → How many times, in frames, the picture will take to change its initial settings to target settings. If target setting is not enabled, this will be automatically set to 1.
- Easing → The ease type of movement. Has the same as the show picture command, but also several others.
- Loop → This will decide how many times the picture will perform its changes from initial to target. Set to 0, for just once. Set -1 to be infinity.
- Direction → When set to “normal”, the picture will always move from initial to target. You should only set it to “alternate” when you have a loop different than 0, and want it to move from Initial to Target, and Target to Initial.
Initial & Target
These will be the initial and target settings of the picture. If you just want to show a picture in a specific place, you can set “Enable Target” to false.
I believe most of the options are self-explanatory, but there are things you need to know:
- Align X & Align Y → You can decide on the initial and target position of the picture. You can choose from:
- Align X
- Left(default)
- Center
- Right
- Left-Off Screen(Only Initial)
- Right-Off Screen(Only Initial)
- Align Y
- Top
- Center
- Bottom
- Top-Off Screen(Only Initial)
- Bottom-Off Screen(Only Initial)
- Align X
- Offset X & Offset Y → After the plugin auto-calculates the picture position according to the alignment, you can add an offset value to add to that position. If you just want to set an X and Y value, set the Align X to Left and Align Y to Top
- Easing → How the picture will move from initial to target. More information on the easing part is here: https://easings.net/
- Skew X & Y → Skew is a property that tilts the picture horizontally or vertically without rotating it. Its values are in radians. In other words, it “warps” the picture causing a shear effect. You can use decimal values.
*All color parameters are in numbers. Meaning, no Hex or no HTML Name colors.
*Alpha and Scale Width/Height are set in the range of 0 to 1. You can use decimals.
Mask Settings
Masking is a way to cover an image with another image. Some parts of the main picture will be hidden and others not, according to the mask. In other words, you will set a limit to what you can see from the image through the mask. If you try changing the picture position, it will move, but “inside” the mask.
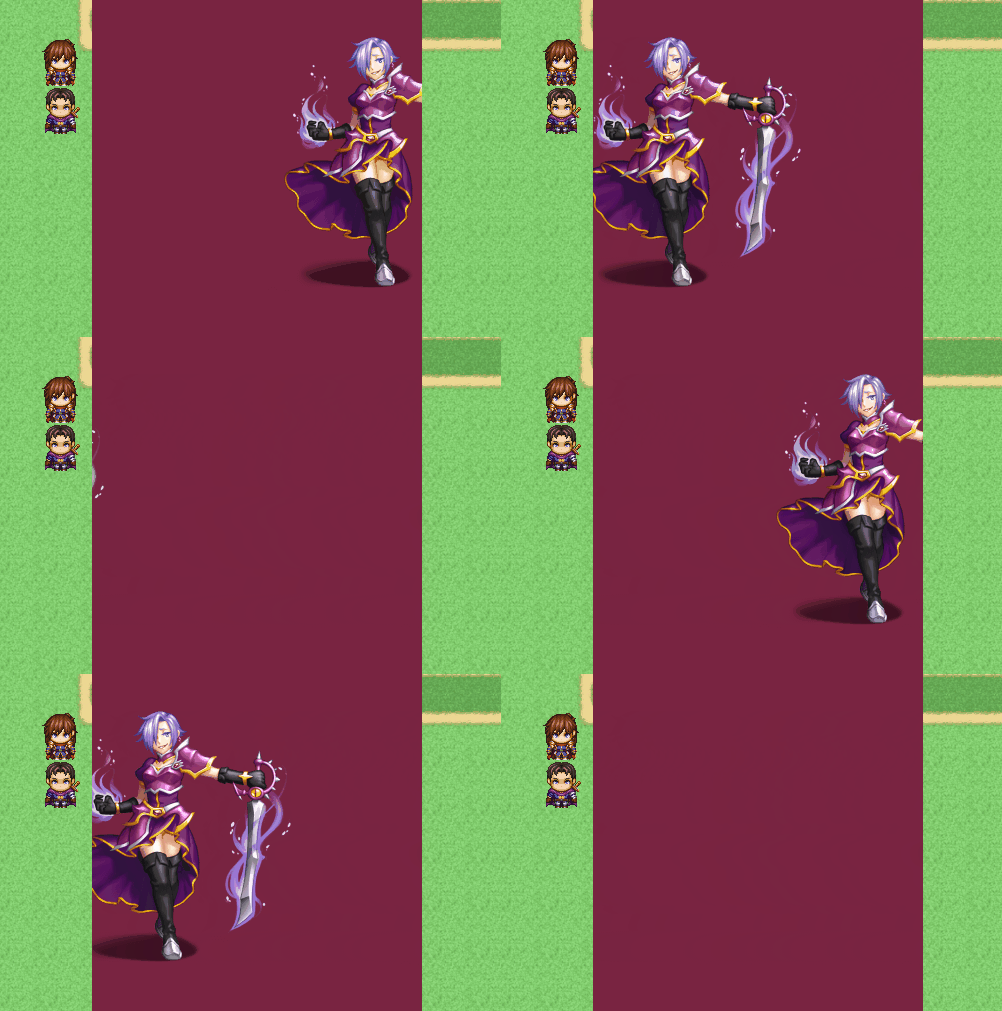
More information on how masks work here.
- Type → If you do not want to use a mask on the picture, set it to none. Otherwise, choose a type for it.
- Image → If you choose an image to be used as a mask, it will ignore any Type you choose and apply the image.
For both Image and other types, you can decide a position inside(and relative) to the main picture to put the mask on. I strongly advise you, when using mask images, to set up an image with the same dimensions as the main picture. Otherwise, maybe, just maybe, you can have a hard time setting the mask position.
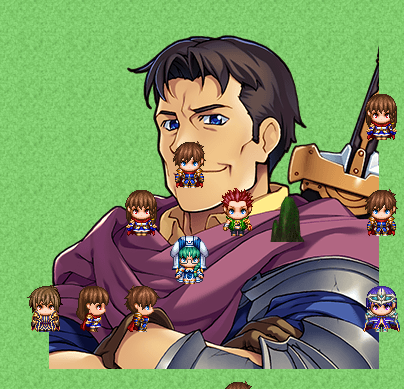
Shape Examples: rect, circle, rounded rect, star(respectively).
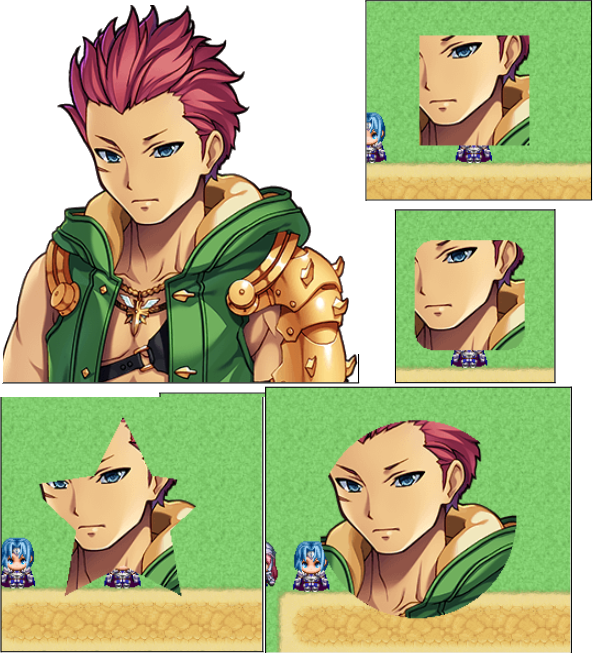
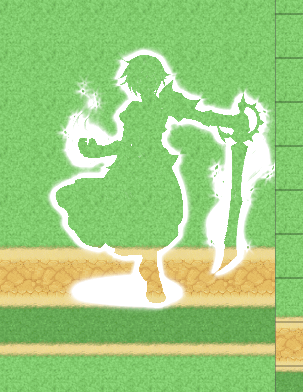
Image Example:

Masks may not work very well with breath and float effects.
Filters
You can optionally apply PIXI filters to the pictures. If you do not want to apply, just leave it empty.
Choose a filter type and the configuration parameter that matches the filter type. You can see better the filters working on this website:
(Although this is an advanced version of Pixi Filters, that may have some features that the RPG Maker PIXI Filters may not have. At least will give you an idea)
Below a list of available filters:
- Blur Filter
- Bulge Pinch Filter
- Color Matrix Filter
- Glow Filter
- Outline Filter
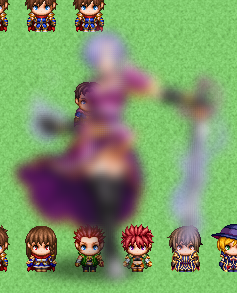
Blur Example:
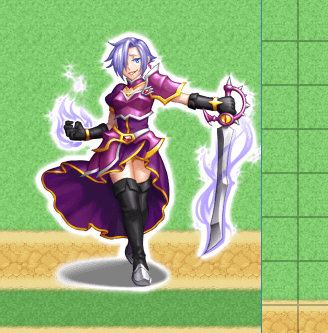
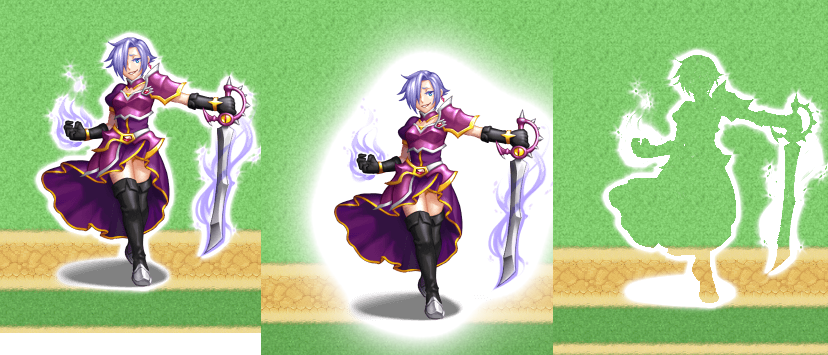
Glow Examples(Outline is almost the same. But it seems that the lines are sharper and also perform better. It only have the option to outline the outside of the picture though):
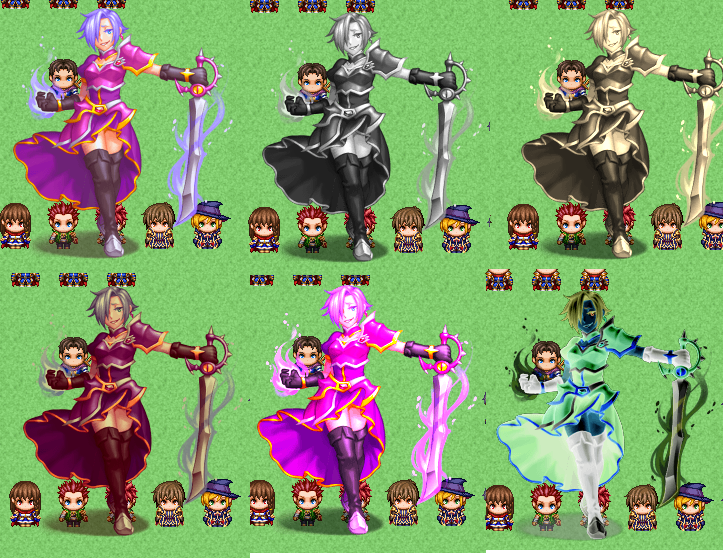
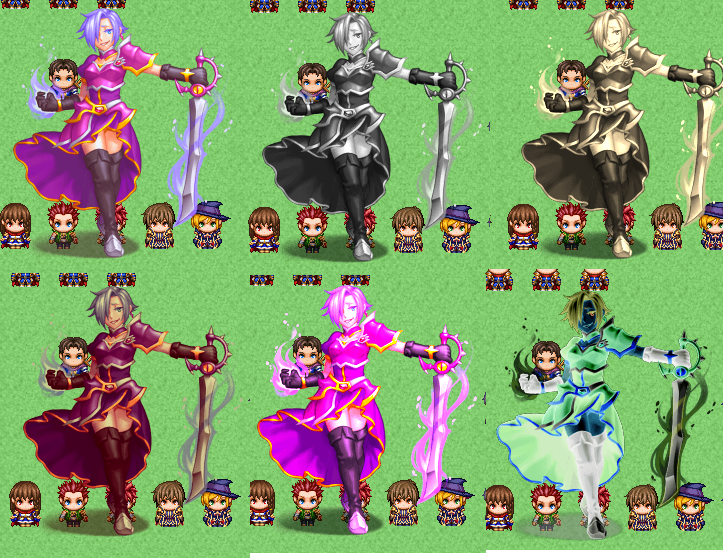
Color Matrix Examples:
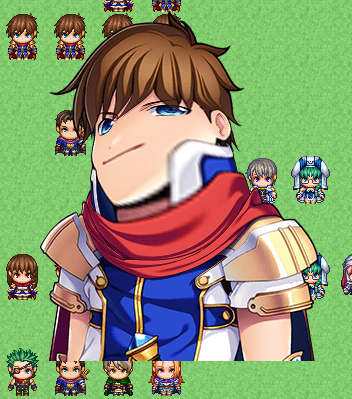
Bulge Pinch Example:
Picture Container
By default, the pictures on RPG Maker have a fixed layer position among the other things on the screen, because it stores all the pictures on a single container. And that container is the one that decides where the position of all pictures relative to other visual stuff shown on the screen. They also have a layer position that is relative to the other pictures, and it is decided by their ID number. So, for example, all the pictures are above the characters. But a picture with ID 2 is above a picture with ID 1.
In this plugin, I created some more containers, as an attempt to let the user show the pictures on different layers across the game. They are:
- Default → On the same layer position that the default pictures are.
- Tilemap → These pictures will be on the same container as the tiles and characters. Meaning, you can place pictures between characters and tiles. Below all characters too. You just need to put the z-index of the picture, in the place you want. Remember, you can use decimals too. Here is a list of the default sprites that are inside the tilemap, and his z indexes:
- 0 → The bottom tiles.
- 1 → All events with priority Below Characters.
- 3 → All events with priority Same as Character
- 4 → Star Tiles
- 5 → All events with priority Above Character
- 6 → Shadow Sprite
- 9 → Sprite Destination
- Below Weather → These pictures will be shown below the weather effects.
- Below Window → These pictures will be shown below the Windows(that are set inside the Window Layer).
- Above Window → These pictures will be shown above the Windows(that are inside the Window Layer)
- Above Everything → Well, the name says it all.
Layer Index → The layer of the picture relative to the other pictures on the same container.
Bind to the map (ATTENTION)
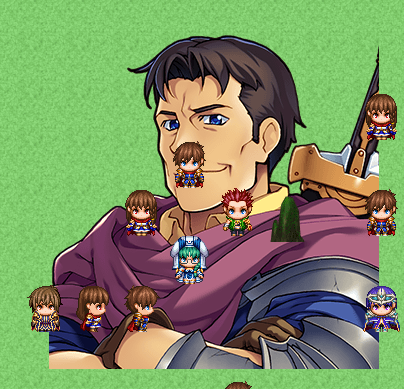
If true, the picture will be attached to the map, instead of the screen. This may also not work very well with breath effects.
This has a higher chance to not work with looping maps. On my tests. It did only work if you set the picture Origin(anchor) to Center. Still, it did not work on all maps with different sizes. You can try it, but I cannot guarantee that it will not behave strangely.
If the map does not loop, it will work just fine.
Relative Object
This is an advanced command. And you will need some javascript knowledge to use it.
By default, picture coordinates are relative to the screen(Relative Object = “none”).
So, X = 0 and Y = 0, will be equal to put the picture on the upper left corner of the game screen. But with relative objects, the picture's X and Y coordinates will be according to another object on the screen.
So let’s say Picture ID 1 is relative to the screen, and it is on X = 300 and Y = 400.
You want to show another picture, ID 2, in the same position, just a little to the right.
So, when using the command to show the picture ID 2, you can set the picture ID 1 as a relative object:
- Eli.PictureManager.getGamePicture(1)
And then for Picture ID 2 the X = 0 and Y = 0, will mean: X = 300 and Y = 400(The same ones as Picture ID 1). So, by putting X = 20 and Y = 13, means that in fact Picture 2 will be set at a position equal to Picture 1, but with plus 20 and 13 on X and Y.
If perhaps the relative object has properties .width and .height, the alignment of the Picture 2 will also be according to those properties instead of the screen size. Meaning, if you want for Picture 2 to be on center of the Picture 1, you can use the Picture 1 sprite as relative object:
- Eli.PictureManager.getSpriteAnimePicture(1)
Then set the alignment X, Y of the Picture 2 to Center, Center.
It is important that the relative object has the properties .x and .y Otherwise, this command will not work.
Refresh on Scene Change
This option is valid when you show a picture that has different Initial and Target properties.
When you already have a picture on the screen, and then change scenes(Like opening the Menu), you can decide if the picture will play his movement animation again, or if it will stay in the position it was, before you change scene.
So, set it to true, if you want the picture to play its animation again.
Common Events
- Mouse Enter Common Event Id → Plays a common event when the mouse enters above a picture.
- Mouse Exit Common Event Id → Plays a common event when the mouse leaves a picture.
- Click/Touch Common Event Id → Plays a common event when clicking/touching the picture.
Wait
If true, it will make the interpreter wait for this picture to finish its movement.
Move Picture
This command was made in case you want to change the picture properties. You can, optionally change all of them at once. Or just one.
For the properties: Duration, Easing, Loop, Direction, Align X, and Align Y, you can set their values again, which will be applied to that movement.
But, for all the other properties, you can decide if you want to change their values or leave them with the same values the picture already has.
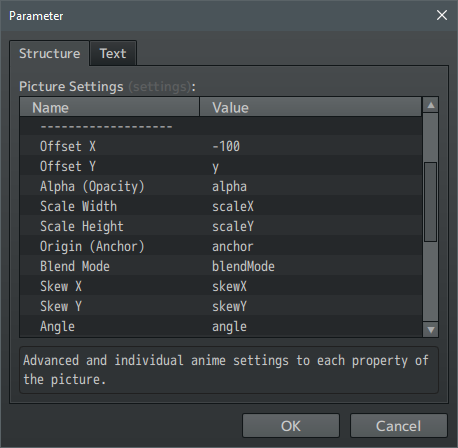
In the image above, you can see that some options have a name on it.
- Offset Y = y
- Skew X = skewX
This means that the command will preserve the current value of these properties.
But on Offset X, you are seeing -100. So, for that property only, the command will apply a change according to the Operation Type.
Operation Type
- Set → The property of the picture will be set to this value. The picture will change its property until it reaches that value.
- If the picture X = 100 and you set the value to 300, the picture will move the X from 100 to 300.
- Add → The property of the picture will be reduced or raised by this value.
- If the picture X = 100 and you set the value to 300, the picture will move the X from 100 + 300 (400).
Advanced Move Picture
It’s similar to the above, but it has a main difference. You can apply different values for Duration, Easing, Loop, and Direction for different properties.
So different from the other commands, you can apply different animation properties for each picture property.
Let’s say you want to change a picture position X and Y.
- The picture X can go to its target destination with a duration of 30 frames and Linear easing.
- The picture Y to its target destination with a duration of 45 frames and with EaseOutQuad easing.
You also have a different way of applying the values. On both operation types, you can use \v[id] or a valid javascript formula.
Operation type Add
You can use two values, and separate them by comma:
- 100, 300 → Picture will be set at position X 100 and move to +300.
You can also just put one value:
- 300 → Picture will move from its current position X to the position X + 300
Operation type Set
You can use two values and separate them by a comma:
- 100, 300 → Picture will be set at the position X 100 and move to the position 300.
If you use just one value:
- 300 → Picture will move to the position X 300.
Advanced Move Prop
It’s the same command as the above. Is just an alternative, in case you want to just change one single property of a picture
Change Mask
This command will let you apply a new one or change an existing mask on the picture.
Remove Mask
Remove the mask from the picture.
Change Settings
This command will let you change the settings of an existing picture. Specifically these ones:
- Filename,
- Relative Object
- Refresh on Scene Change
- Common Events
If you do not want to change a setting, leave the parameter blank. With the exception of the Relative Object, which you can just set to “Same” to not change.
Shake Effect
In the same way the screen shakes with the default event commands, you can make the picture shake with this command! But with the addition that you can choose if you want to shake horizontally, vertically or both!
- Shake X & Y Power→ How many pixels the picture will shake from its original position. If you set 5, the picture will shake randomly a value in the range of -5 and 5.
- Duration → The number of frames the shake will last. If the duration is 0, the picture will not shake.
Breath Effect
It will make the picture have a breath effect. This effect essentially is changing the picture scale X and Y. It raises the scales when the picture is inspiring. And it reduces it when the picture is expiring.
- Apply Breath X & Y→ Set to true if you want the picture to breathe horizontally(X) or vertically(Y).
- Power → How many pixels will change from the current scale X Y values. You can use decimals.
- Duration → How long it will take for the picture to change its scale value to the target scale set by the power argument.
So let’s say you have a picture with scale 1.
If you set the Power to 0.025, then, the picture will breathe from 1 to 1.025( 1 + 0.025).
And for that, it will take the duration specified on the arguments of this command.
*It does not work very well with masks. You can apply a mask while using this effect, but you can have undesired side effects when changing, removing and creating a new one.
Disable Breath Effect
You can disable/enable the breath effects. The game will wait for the breath effect to finish to disable it.
Float Effect
This will make the picture have a floating effect by increasing and decreasing the Y property.
- Float Power → How many pixels the picture will float. Can use decimals.
- Duration → The duration that will take for the picture to float to the current Y to the target set by the float power.
So, let’s say you have a picture with Y = 200.
Then, set your Float Power to 25.
This means your picture will float from 200 to 175 on the specific duration you set.
Disable Float Effect
You can disable/enable the float effect. The game will wait for the float effect to finish to disable it.
Card Effect
To create a card effect, you have to use other commands together with this.
If you create an animation on the scale properties from 1 to -1, it will produce the flip effect of a card. If you set it to Scale X, the flip will happen horizontally. If you set it to Scale Y, vertically.
- Front Bitmap → The image that this picture will have when the scale values are higher than 0.
- Back Bitmap → The image that this picture will have when the scale is less than 0.
- Flip Type → You can choose to be Horizontal, Vertical, or both. Choose it according to the animation you set for the scales. Although you can set Flip Type to be Both, this is only for fun. I believe this option could provide undesired side effects.
So, what this command will do on code is, detect the picture scale value, and apply the Front Bitmap for scale higher than 0 and Back Bitmap for scale lower than 0.
Add / Change Filters
This command lets you apply or change existing filters on one or more pictures. It works essentially the same as the one on the Full Show Picture command. If a filter is disabled, it will enable it back.
Operate Filters
Here you can Enable, Disable, Toggle or delete the filters from the pictures.
Important to know that a disabled filter is not a deleted filter.
Compatibility
EliMZ Camera Manager
If you set round pixels to true on the plugin parameter, the breath and float effects may look funny. That is because round pixels make all rpg maker more driven to pixel perfect style. And that will conflict with stuff that needs to use decimals values, like those two effects.
Help file | Terms of use | Sample Project

Old videos:
Version 1.1.0
Version 1.0.0
Purchase
In order to download this RPG Maker Plugin you must purchase it at or above the minimum price of $15 USD. You will get access to the following files:
Development log
- Picture Manager 1.4.7 - Bug fixes!Jun 23, 2026
- Picture Manager 1.4.6 - Bug fixes!Jun 10, 2026
- 1.4.5 - Bug fixesFeb 03, 2026
- 1.4.4 - Bug fix!Dec 26, 2025
- 1.4.3 - Bug fix!Dec 19, 2025
- 1.4.2 - Bug fixes!Dec 18, 2025
- Version 1.4.1 - Bug fixes!Dec 04, 2025
- 1.4.0 - New feature and bug fixesNov 03, 2025