Hakuen Studio Minimap for RPG Maker MZ
A downloadable RPG Maker Plugin
Introduction
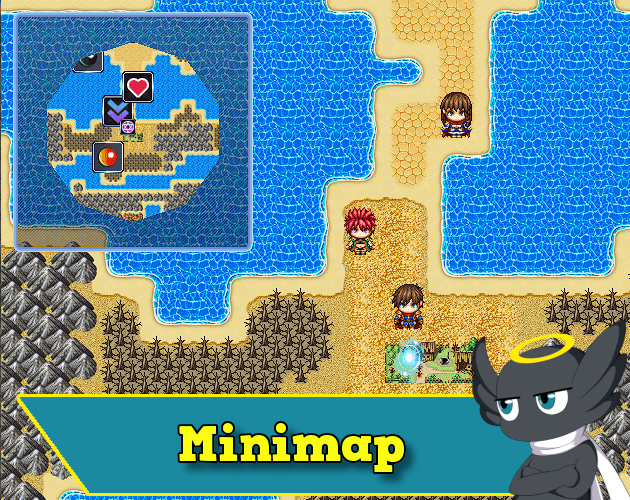
If your game has large maps or you are making a tactical RPG, or if you just want to add a nice minimap on your project, that is your plugin!
Features
- Create mini-maps from images or drawings!
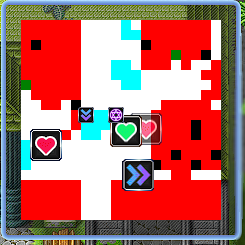
- Highly customizable selection of colors for drawing the minimap:
- Region Id, Terrain tags, Passable/Impassable, Ladder, Bush, Counter, and Damage Floor!
- Use minimap markers:
- Custom Icons! Change icon zoom, hue, and much more!
- Default map character sprites
- Create marker templates for quick use in events/actors!
- Hide/Show the minimap with a switch.
- Fog of war / Cover & Reveal feature on the minimap!
- Overlay image above the minimap!
- Set 5 different shapes for mini-maps!
- Put a mini-map inside a window!
- See a full mini-map on a different scene!
- Add a noise filter to the minimap!
- Play common event when clicking/touch minimap
- Transparent minimap!
Plugin Parameters
Minimap (Scene Map)
- Hide Switch → If this switch is ON, it will hide the minimap.
- Click/Touch CE → Select a common event to play when clicking/touching the minimap.
- Mask → The mask is the area that will show the minimap. So no matter how big is your minimap, it will only be shown on the mask area you defined.
- Shape → You can choose to define this area in many ways: Rectangle, Circle, Rounded Rectangle, Star, or an image.
- Window → Optionally, you can decide to show the minimap inside a window and adjust some settings for it.
- Background → That background will be drawn below the minimap. Or between the minimap and the window, in case you choose to use a window. Leave the opacity 0 or the color empty if you do not want to use it.
- Position → The minimap position on the screen. It will auto-calculate the position according to the Align parameters. But you can also add an offset value to that position.
- Noise Filter → You can optionally set a noise filter on the minimap.
- Layer → If perhaps you are using the window container for the minimap, you can choose if you want the noise filter to apply all over the window and on the minimap or just on the minimap.
- Intensity → The noise intensity should be a normalized value in the range 0 - 1. You can use decimals. Alternatively, you can set “random” and the plugin will choose a random value for it.
- Seed → The seed should be a normalized value in the range 0 - 1. You can use decimals. Alternatively, you can set “random” and the plugin will choose a random value for it.
- Dynamic Seed → If this is true, the seed will keep changing randomly while the minimap is opened.
- Seed timer → If Dynamic Seed is true, this will determine the time, in frames, that the seed will change.
- Overlay Image → This is an optional image for you to load, that will be above the minimap. You can use it to create a border, or just a “watermark” or something like that.
- Opacity → The opacity of the minimap.
Full Minimap (Scene Minimap)
This parameter is used for a custom scene exclusively for your minimap. Currently, it is just a way for you to see all your minimap. This means that you can open a bigger version of your minimap and scroll to see all the map areas.
- Scene Background → Let you set a background image exclusively for the minimap scene.
- Camera → On the full minimap scene, you don’t have the player character move the minimap camera. So here you can set up the camera movement speed. It works like a character moving the map.
- Move Speed → How fast the camera will move.
- Dash Speed → How much speed will be added to the movement speed when “shift” is being pressed. So if you are pressing shift while moving the camera, it can move faster.
Full Minimap controls
Use the directional keys to move the camera. Hold Shift to apply the Dash Speed value. Press Cancel/Esc or use touch cancel/right click to leave the scene.
The rest of the parameters are equal to the Scene Map minimap. With the exception that it does not have the switch and common event parameter.
Common Settings
These are settings that are applied to both the Scene Map minimap and the Scene Minimap.
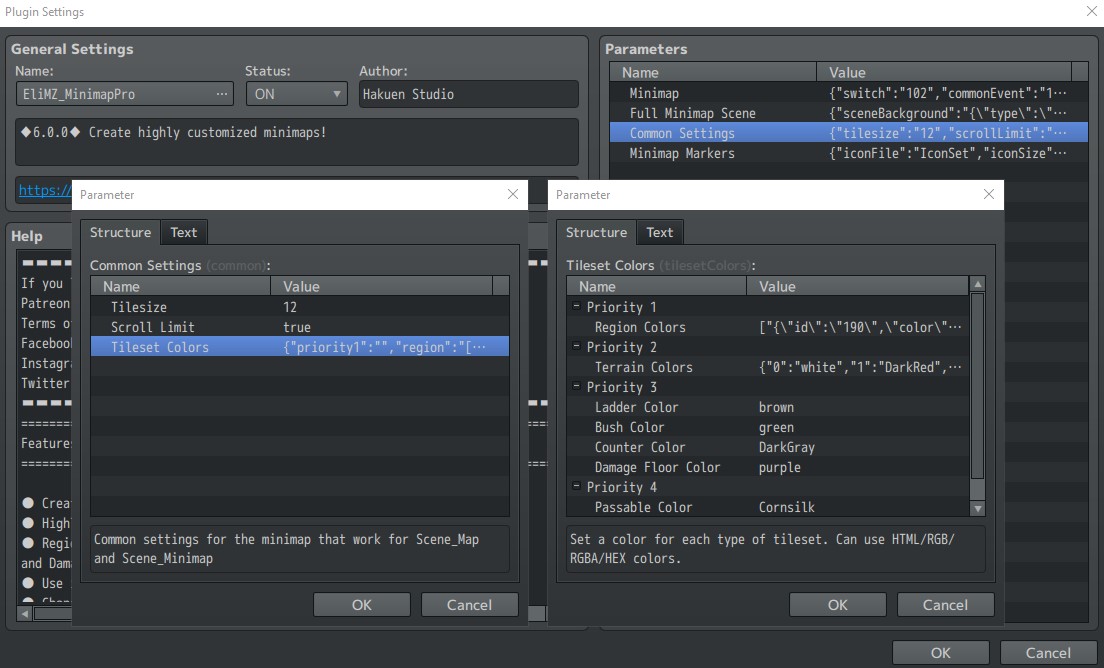
- Tilesize → By default it is 12. Try to only set even numbers. It will draw the minimap like it has a tile size of 12.
- Scroll Limit → If set to true, the minimap will stop scrolling together with the default map. If false, then the minimap will keep scrolling as long as the player can move.
Fog of War / Cover Map
- Enable → If true, the plugin will use the feature of covering the minimap, and keep revealing it as the player walks. Still, for a map to have the cover feature, you need to use a map note tag: <MinimapFog>
- Color → The color used to cover the map.
- Range Variable → The Id of the variable used to decide how many tiles the player can reveal as he walks.
Tileset Colors
If you choose to use the drawn minimap instead of an image, you can customize the colors the plugin will use to paint your minimap according to the characteristics of each tile. Each property of the tile has a priority. The plugin will always choose the highest priority property. This means it will look for the colors in this order:
Priority 1
- Region Colors → Define a color for a region id.
Priority 2
- Terrain Colors → Define a color for a terrain tag.
Priority 3
- Ladder, Bush, Counter, Damage → You can define a color for each of them.
Priority 4
- Passable/Impassable → You can define a different color for both.
Transparent color → In any tile color field, write transparent to clear the matching minimap tile instead of painting it. This is useful for creating transparent areas on drawn minimaps.
Blank color → Leaving a color field blank means that rule will not provide a color. It is different from transparent, which actively erases/clears the minimap tile.
Priority still applies → If a higher priority rule uses transparent, it clears the tile and the lower priority colors will not be used. For precise transparent areas, create a Region Color entry with color set to transparent and paint that region on the map.
Minimap Markers
Here you will define some settings for the minimap markers. They can either be an Icon or a Map sprite!
- Icon Image → Optionally, you can choose to use another iconset image than the default one.
- Size → The general size of the icon.
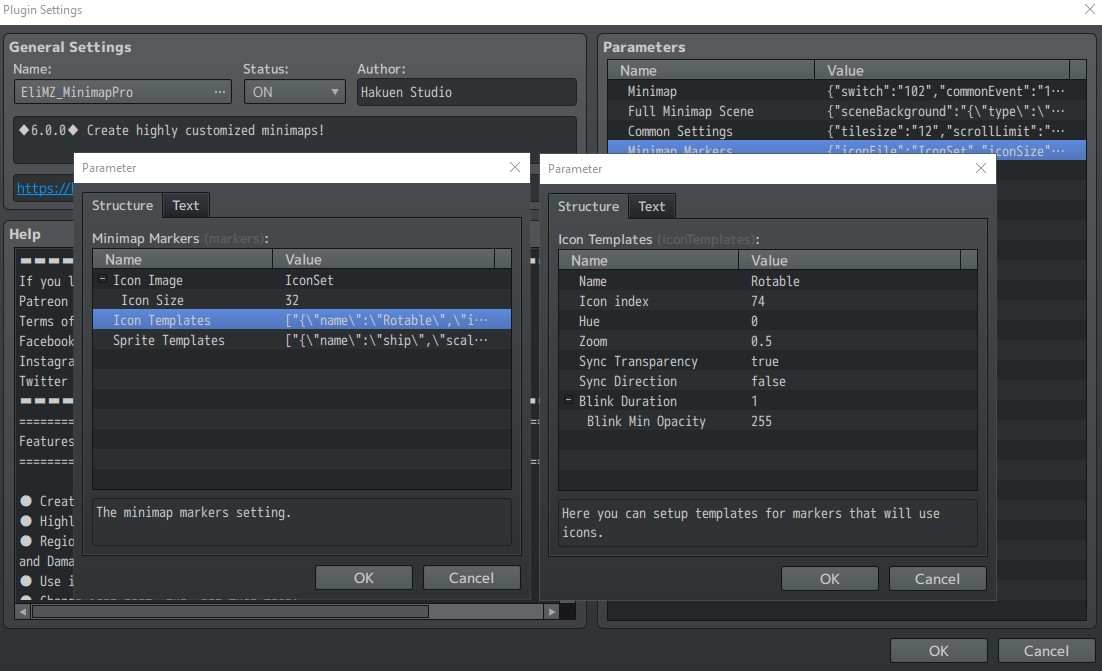
- Icon Templates → You can optionally build some icon markers templates for quick use on Actor note tags, Event notes, and Event comments.
- Name → The name of the template. It is not case-sensitive, but it can’t have spaces. This is what you will use to reference the Actor Note Tags and events.
- Icon Index → The icon to be used for that template.
- Hue → You can change the hue of the icon.
- Zoom → You can change the zoom of the icon. Can use decimals, like 0.5.
- Sync Transparency → If true, the icon on the minimap will also be transparent when its character is transparent.
- Sync Direction → If true, the icon will rotate according to its character direction.
- Blink Duration → Optionally if you set this value above 1, it will make the marker on the minimap blink.
- Minimum Opacity → If the Blink Duration is above 1, the opacity of the marker will be changing from the minimum opacity value to 255.
- Visibility on Fog → If true, the marker will be visible on Fog. But still, follow the opacity and transparency rules.
- Sprite Templates → Similar to icon templates, but it works by showing the actual map sprite of the character on the minimap. It does not have Hue and Icon index options. But it has a new parameter:
- Sync Step Animation → If true, it will sync the marker step animation with its character.
NOTE¹: The only way to create markers for vehicles is through templates. You can choose one of the vehicle types or write another name in case you are using any custom vehicle.
How to use
Creating Minimaps with Note tags
To create a minimap you can use the note tags on the map note fields:
- <TileMinimap>
- <ImgMinimap: myImageName> (It will look for that image inside the img/minimap folder)
You can generate this image with the editor option to save a map png.
They are case-sensitive. Don't use spaces on the minimap image.
Opening the Full Minimap Scene
Use the plugin command Call Scene to open the Full Minimap scene. The map must have either <TileMinimap> or <ImgMinimap: imageName> in its map notes.
Inside the Full Minimap scene, move the camera with the directional keys, hold Shift for faster movement, and press Cancel/Esc or use touch cancel/right click to return to the previous scene.
Creating Minimap Markers
You can optionally create minimap markers to represent the map characters on the minimap. They can be either a Map Sprite or an Icon.
There are two note tags to make that happen:
<MMIcon: Icon index, zoom, Hue, Sync Direction, Sync Transparency, BlinkDuration, MinOpacity, FogVisibility>
- Icon index → Mandatory.
- Zoom → Default is 0.5.
- Hue → Default is 0.
- Sync Direction → Default is false.
- Sync Transparency → Default is true.
- Blink Duration → Default is 1
- Min Opacity → Default is 255
- FogVisibility → Default is false.
Example: <MMIcon: 74, 0.5, 0, true, true, 30, 120>
<MMSprite: zoom, Sync Step Animation, Sync Direction, Sync Transparency, BlinkDuration, MinOpacity, FogVisibility>
- Zoom → Default is 0.5.
- Sync Step Animation → Default is true.
- Sync Direction → Default is true.
- Sync Transparency → Default is true.
- Blink Duration → Default is 1
- Min Opacity → Default is 255
- FogVisibility → Default is false.
Example: <MMSprite: 0.5, false, true, true, 1, 255>
Fill that the same way you fill them on the plugin parameters.
So, for actors, you create a marker by putting one of these note tags on the actor note field.
For events, you can create them by either applying them to the note field or as a comment. The comment way has priority over the note field.
Alternatively, instead of drawing the note tags, you can just use a template by referencing its name on the first note tag argument:
- <MMIcon: Dog>
- <MMSprite: Player>
If you have templates with these names, it will get the data from them. Template names are not case-sensitive. But the note tags are!
Applying Fog/Cover to the Minimaps
Optionally you can add a fog/cover to the Minimap(not the game map). To do that, you need two things:
Enable this feature on the Plugin Parameter, under the common settings.
After that, if you want a Minimap to have the cover, just use a note tag on the map notes:
- <MinimapFog>
What the player has discovered on the minimap will be saved into the save file.
Creating Transparent Areas on Tile Minimaps
For maps using <TileMinimap>, write transparent in a Region Color, Terrain Color, Ladder, Bush, Counter, Damage, Passable, or Impassable color field to clear the matching minimap tiles.
The recommended precise setup is to create a Region Color with the desired region id and set its color to transparent. Then paint that region on the tiles that should disappear from the minimap.
Leaving a color empty only skips that rule. Use transparent when you want the tile to be erased from the minimap.
This only affects the minimap drawing. It does not change the real game map tiles. For image minimaps, transparency comes from the image file itself, while fog reveal still clears the fog cover on top of the image.
To make the minimap container/background invisible, leave the Background color blank or keep its opacity at 0.
Plugin Command
Call Scene
Use that plugin command to call the full minimap scene.
Some videos about it:
Char Sprites on the minimap
Noise filter
Minimap Fog of War
Help File | Terms of use | Sample project

Purchase
In order to download this RPG Maker Plugin you must purchase it at or above the minimum price of $20 USD. You will get access to the following files:
Development log
- 2.4.1 - Bug fixes!58 days ago
- Minimap 2.4.0 - Small feature, lot of bug fixes and performance improvements!May 29, 2026
- 2.3.3 - Bug FixNov 10, 2025
- Version 2.3.2 - Lots of Bug fixes!Sep 18, 2025
- 2.3.1 - Bug Fixes!Aug 26, 2025
- Version 2.3.0 - Bug fixes!Apr 25, 2024
- Version Number change and minor fixJul 28, 2023
- Version 6.1.3 - Bug fix!May 02, 2023